|
This is a short presentation of the advanced version of the XOverWizard II software. All of our digital crossovers can be
programmed with the XOverWizard II and advanced version is able to perform all of the tasks to measure, optimize and
set up a loudspeaker system. In the advanced version you will find five tabs in the lower left hand corner labled Capture, Target,
Optimizer, Output and X-Over. By selecting one of these tabs, you will be in different parts of the software. EG the Target tab will enable
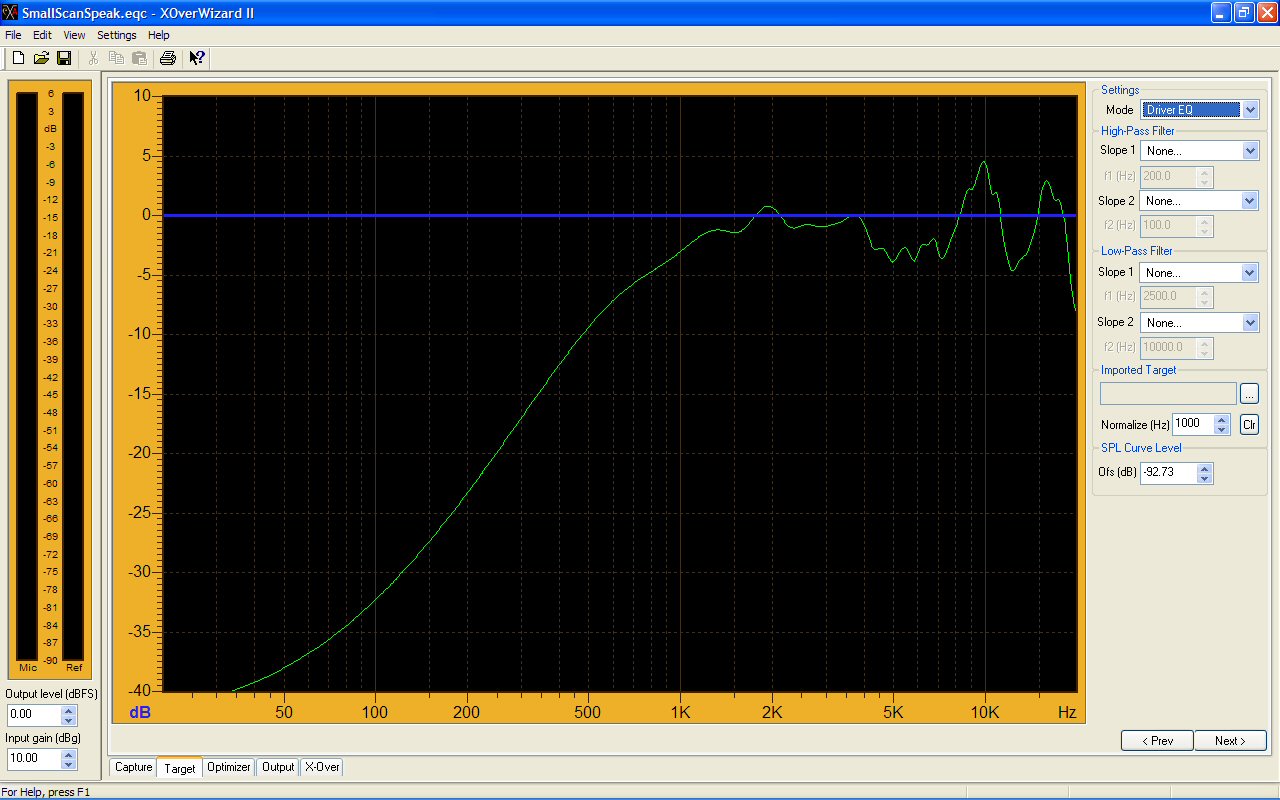
you to setup a target curve for the optimizer engine. A target can be linear, high-pass, low-pass, band-pass or special curves loadable from
a individual created text file.
The latest versions of the advanced XOverWizard II software can be downloaded at the Technical page.
Click the pictures below for a lager view
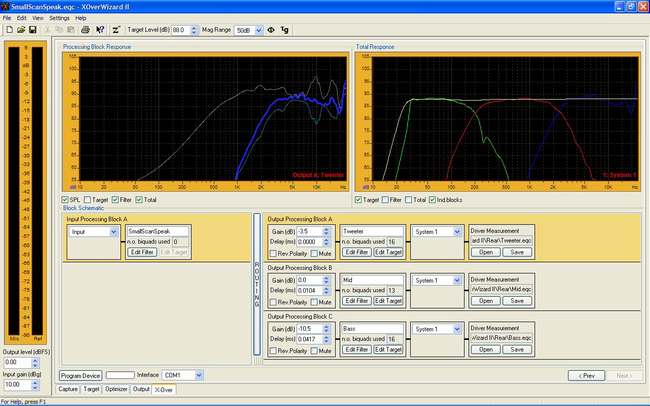
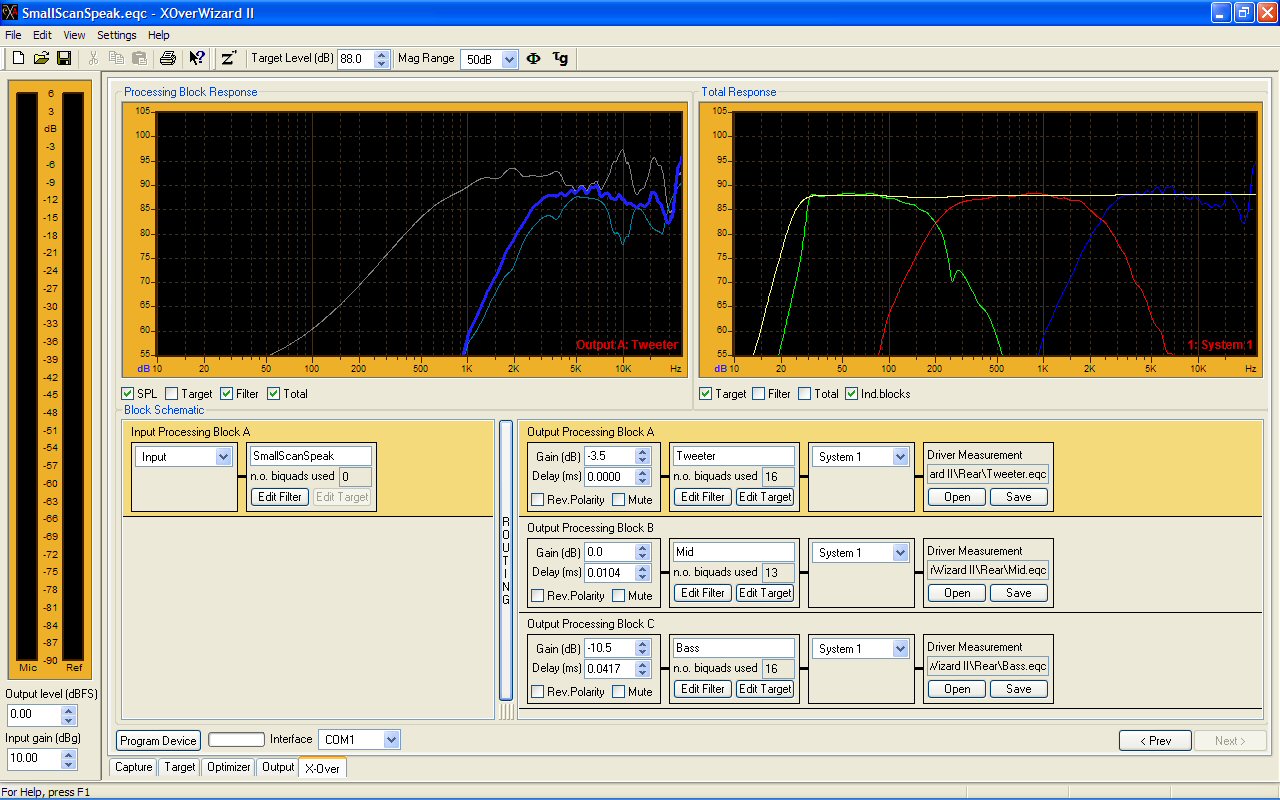
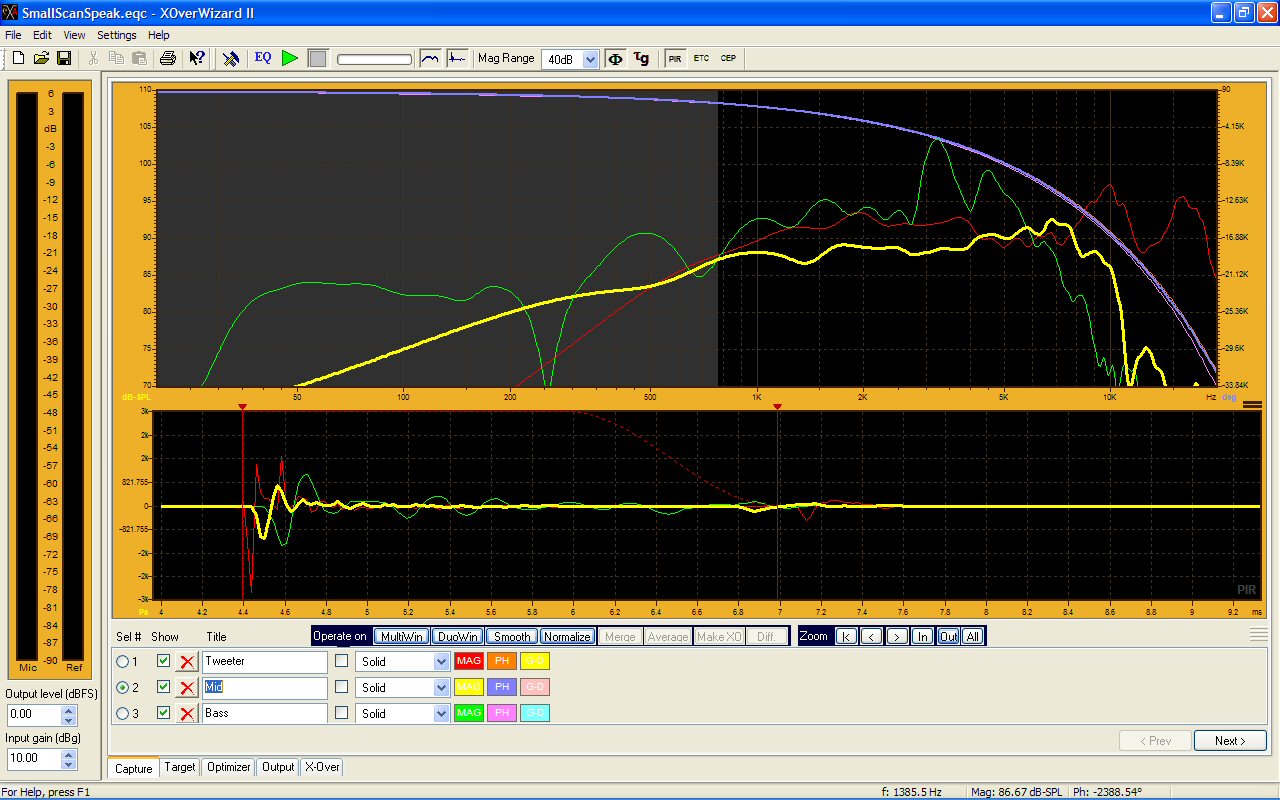
Total view of the Advanced version after setting up a loudspeaker with ScanSpeak drivers

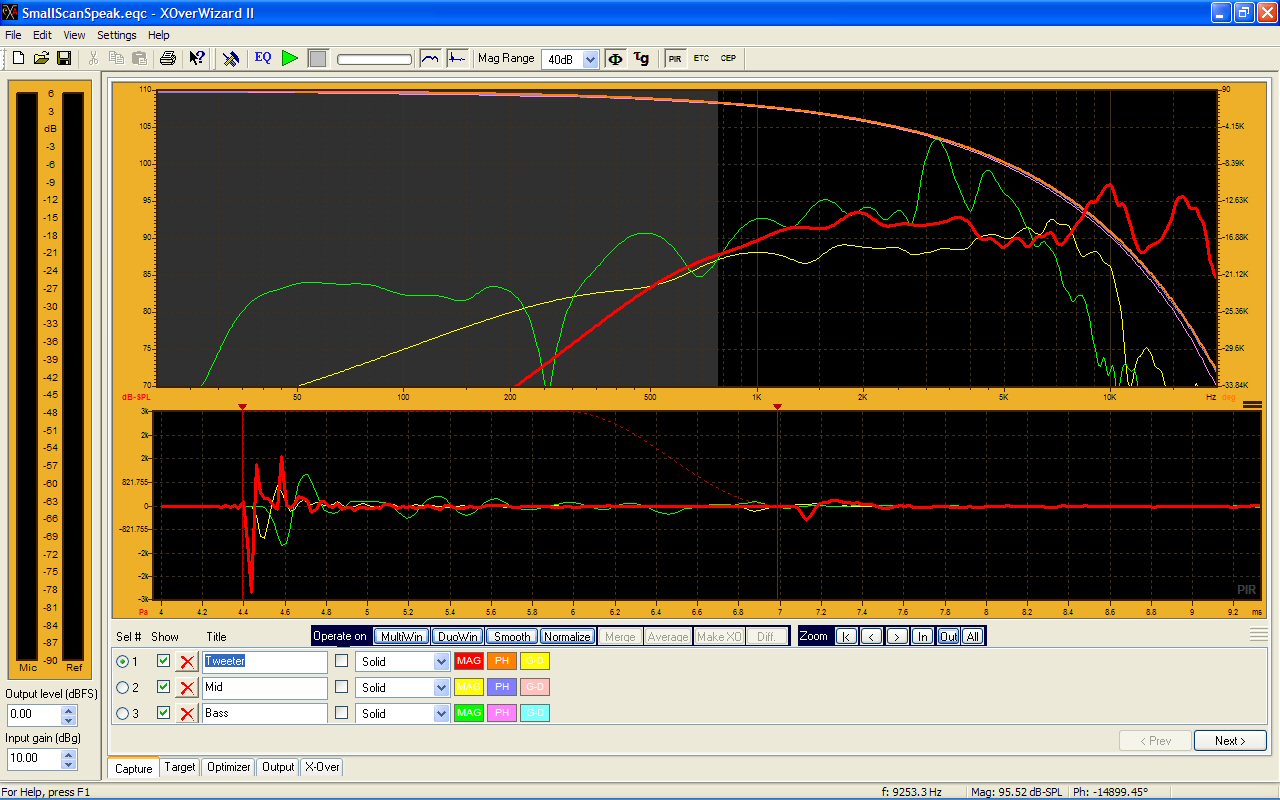
The ScanSpeak tweeter measurement is highlighted (red curve) in the capture tab - PIR and frequency response
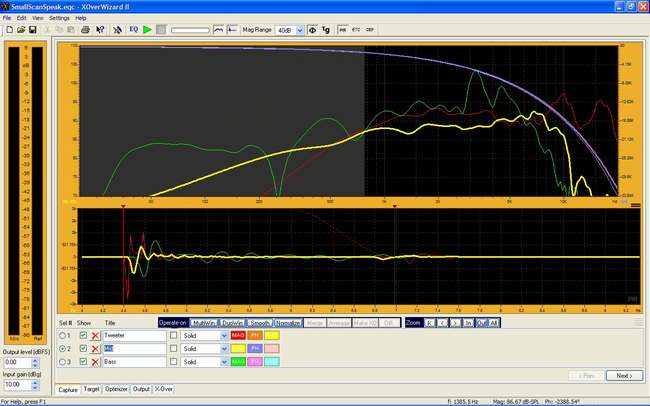
The ScanSpeak midrange driver measurement is highlighted (yellow curve) in the capture tab
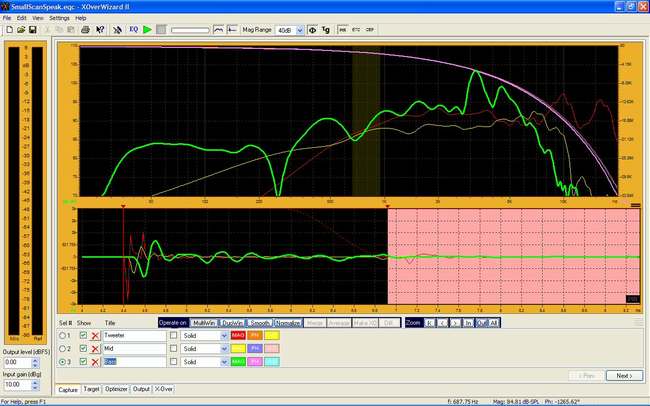
The ScanSpeak bass measurement is highlighted (green curve) - notice the multi window function
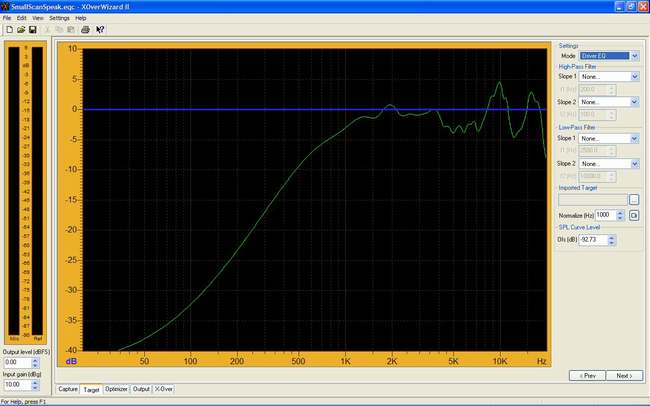
Target curve tab gives the possibility of user determined target - rather than linear response target

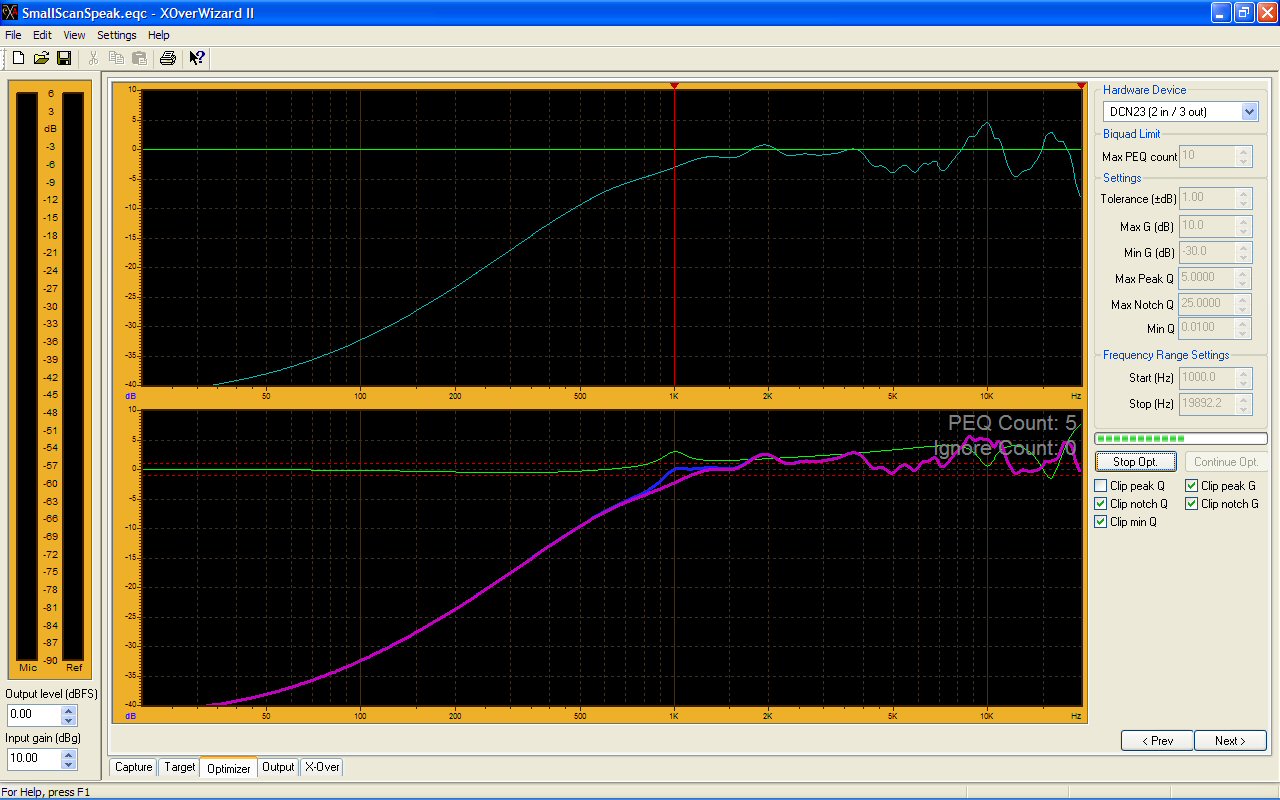
The "optimizer" in action finding the most optimum PEQ value with predefined limitations/settings
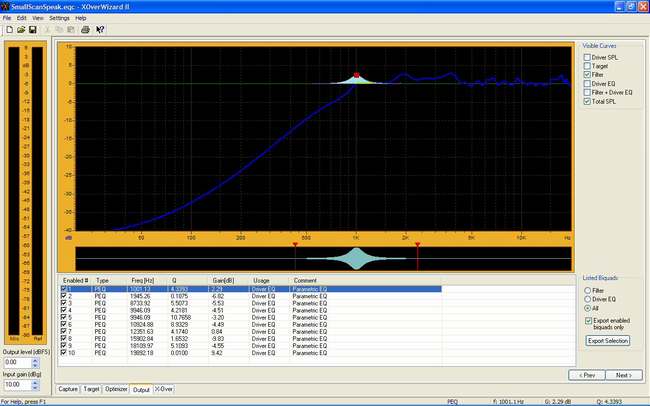
The output tab with a list of PEQ - the user can enable and disable as he/she likes...

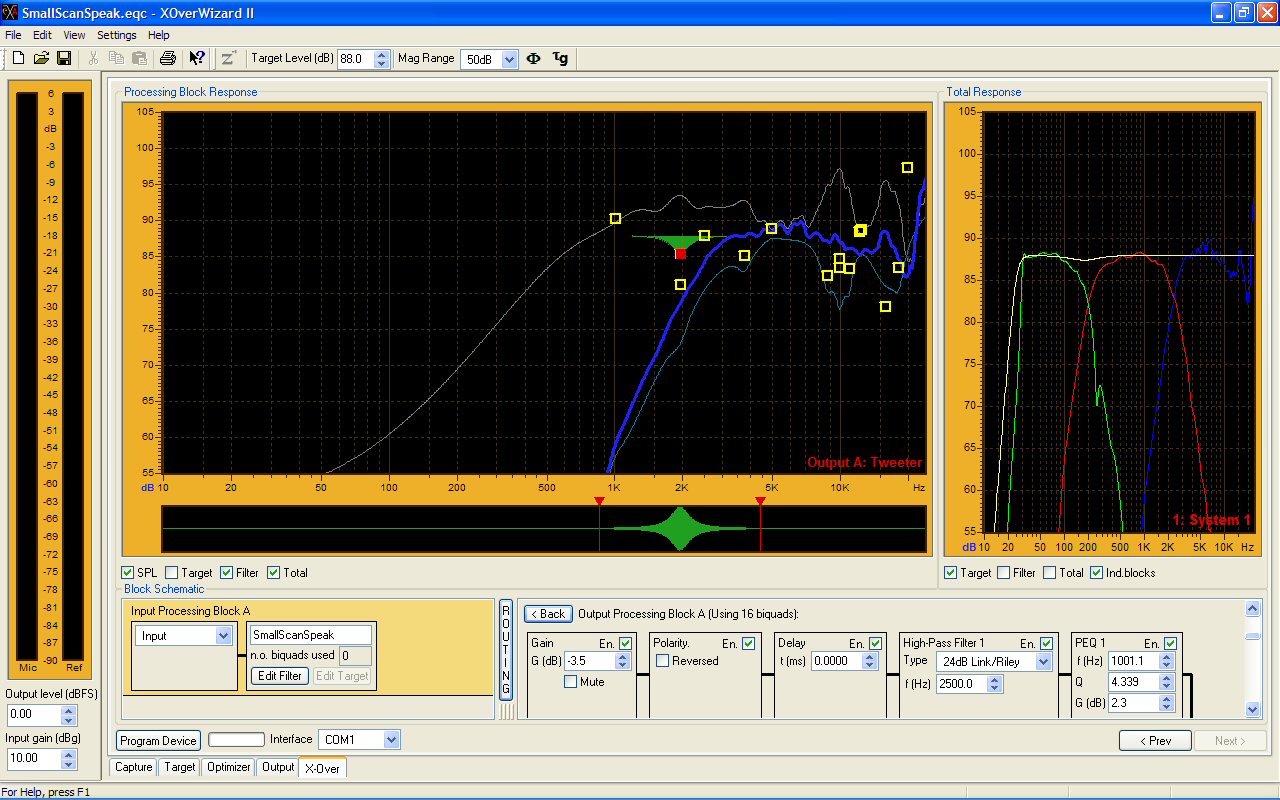
Looking at the resulting optimized tweeter response in the X-Over tab, Block A
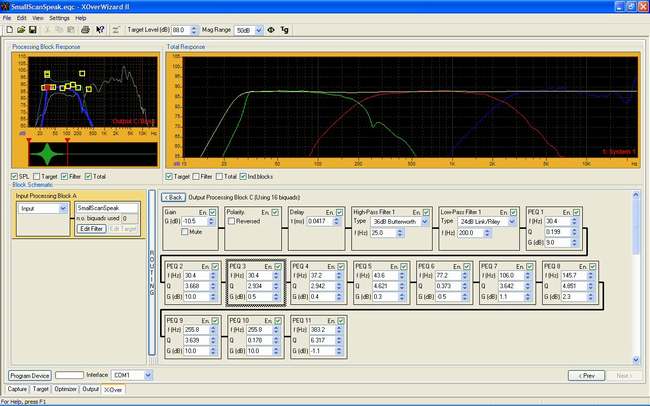
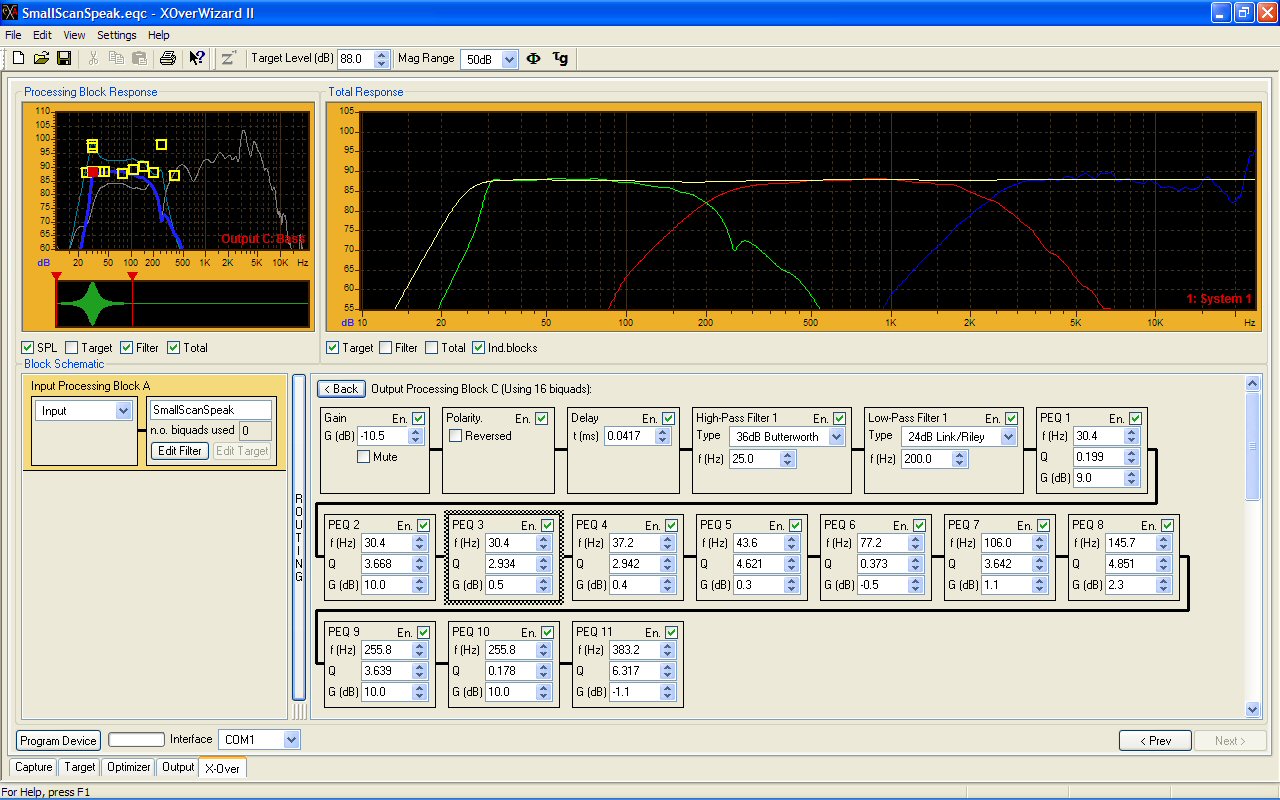
Bass response - the output channel block has Gain, Polarity, Delay, HighPass, LowPass, Shelving, Notch and PEQ

X-Over tab. The input processing block also has HighPass, LowPass, Shelving and PEQ filters
|


 active@groundsound.com